Training Needed: Disengage the Rear and Disengage the Front
Well-trained horses use leg cues, face cues, and seat cues to anticipate what their rider wants them to do. A really well-trained horse and rider can perform with leg and seat cues alone. That is the fancy “bridleless” horse you see at exhibitions.

Generally speaking, the direct rein controls a horse’s face but does not do much for signalling his body. While many horses “follow their face”, and that is adequate for an unsophisticated trail horse, it is so much more exciting if you and your horse know a little more. Directing his body will be the job of your legs and seat.
The Goal
The goal of this lesson is to have your horse move his body off of a leg/heel pressure so slight that a bystander cannot even tell that you have moved your leg or requested any action from your horse. It is difficult for both the horse and rider at first. But, after practice, both of you will become fluid and much more relaxed. (Also see Contact)
The Benefits
It is the first stage of all precision riding. For weekend trail riders, it is important to be able to maneuver your horse away from trees on the trail, toward gates for opening, turning around in tight or dangerous places. An additional benefit: any horse being asked to “dance” by moving this way and that quickly and smoothly will also automatically collect and balance better. He will put more weight on his rear, making him much more agile. He will look more attractive, his physique and muscles in his back will improve, his attitude will be more engaged, and his ride will be smoother.
Scrimshaw, the paint mare in the video, is just beginning to understand how to turn on her haunches with a rider giving her the leg cue.
See Pressure Points of a Horse
 Leg cues are used to tell the horse which part of his body to move which direction. Leg yields are used specifically to move him laterally. I am not a dressage rider. However, here is a picture of a friend riding Cadence (half Friesian- half Arab gelding) practicing a Sidepass maneuver, asking the horse to move off her leg and track to his left. Simply put, your horse will feel your leg or heel pressure on a certain spot on his body, and move away from the pressure (Yield) with that part of his body.
The horse learned during his ground training that moving away from pressure will end the pressure. This is central to his understanding under saddle that he should do the same: move away from the pressure. More precisely, he learned that when he feels a “nudge” on his body-proper, he should move that part of his body away from the nudge. Further, If the nudge is in front of his girth, he should move his front over. If it is behind his girth, he should disengage his rear. Initially this was accomplished by pressure from your hand.
English vs. Western Riding
English riding is different from Western riding in many ways, one of which is the amount of Contact with the horse. There is very little gear between the horse and the rider’s legs in English riding. Leg cues are felt more precisely and more easily. The whole leg from seat to heel is in play. I am not an English rider, but I believe that English cues are more involved with the knee and calf with some heel (see the shoulder-over in the pressure-points picture above. For an English rider, the knee is pressed into the shoulder.) This is simplistic, but please correct me if I am wrong.
In Western riding, most of the lateral cues are given with calf and heel. All of the equipment between the horse and the rider’s legs makes it difficult to use whole-leg cues in a precise way, and western riders rely more on heel pressure for spins, lifts, and disengages. You can place your heel more precisely and it has more direct contact with the horse’s actual body.
Most of this discussion centers on casual Western riding.
Two legs pressuring his girth in a “neutral” position (neither forward nor behind the girth) moves him straight ahead.
Right leg pressuring his girth (slightly forward of the cinch) will move his shoulder away to the left.
Right leg pressure behind the middle (just behind the cinch) should move his hind quarters away to the left.
Right leg pressure middle should help him move his rib cage away or up so that he moves his whole body left or arches around the leg. (This leg-middle position is used as a pivot-point when asking him to bend around your leg, but the rein cue is different.)
Rear Leg Yields Under Saddle
Method 1 Open Pen or Arena. Using the Tap.
Start the Rear Disengage (western riding)
Mount your horse and stand still for a minute or two in the center of the ring. Do some flexing of his head and neck to set the tone and loosen his attitude. Now, take up your reins. Sit tall, but turn at your waist and look at his rear and your foot to start introducing him to the feel of your body changing its weight distribution vis-a-vis your seat bones (a seat cue).
Simultaneously ask your horse to bring his head around softly to start him bending in the right direction. (Adjusting YOUR position is frowned upon with English riding. However, I start by adjusting, and exaggerate in the beginning to help the naturally-trained horse to take notice of his rear, as you are requesting the move. This “twist” will become more subtle as the maneuver gets easier.)
Using the same steps described on the ground using direct pressure replace your “hand” cue with your leg/heel. Use your left heel to swing his rear right and your right leg to swing him left. Press with the calf and heel in the rear-girth pressure area that you used when you taught him to disengage his rear with a hand-nudge in the same area. (Exaggerate this movement to make it more obvious and be sure to take your OUTSIDE LEG OFF of his body. This “opens the door” on the off-side for him to move through – away from the pressure without running into pressure on the other side. Exaggerate the “open-door-no-pressure” outside leg position.)
If the horse doesn’t move (the usual first try), then take up the end of your rein or your small crop and lightly tap his rear rhythmically so that his attention is drawn to that area of his body: tap, tap, tap. Because this tapping for movement is a familiar routine from ground training, the horse will probably understand this in just a couple of tries.
Resist the temptation to kick. He will need a heel nudge only as harsh as your gentle request here. If he does not comply, the fanny-tap, TAP! will move him smartly around. It is easy for him to understand because you have used it before. Use only as much tap-pressure as needed to get movement. Too much may make him JUMP around. Too little and he will ignore it.
Once the horse takes a step or two, release the leg and the rein just as soon as he stops moving his feet and relaxes his neck.
Kiss a little to get movement. If you have an observer, ask your partner to tell you if your horse is moving with correct foot pattern. Ask for only one or two steps at first. RELEASE. Stop and rest.
Ask for one step in the right direction. Then relax. Ask again. Relax. To get two steps, ask for one, release, ask for another, release. This “pressure” and “release” will have him moving all of the way around in no time. Practice until your horse moves with precision and speed for several steps.
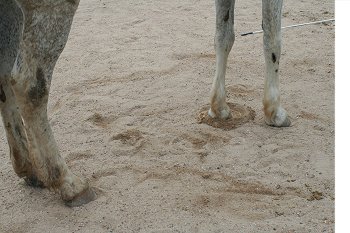
Done correctly, his rear moves all of the way around his front leg. You should be able to look at the ground and see that his inside front leg has “drilled” a hole into the ground and his rear legs have walked around it.
Exaggeration is a key element of training. While I don’t expect you to ride with your legs looking like open scissors, we must exaggerate for both the unschooled horse and the unschooled rider. Both will develop subtlety as we go.
Method 2 Using the Fence
If the horse insists on walking forward or going the wrong direction, take up the position on the fence demonstrated in the video below. The fence parallel to his body will act as a barrier to moving his rear in the wrong direction. It makes it easy for him to offer the right try. It helps him decide what you want by eliminating wrong decisions.
Here is a beautiful video of a young horse being taught to disengage his rear and his front under saddle. You may not find it quite as easy as this looks, but if you have done your ground work well, your horse should pick this up fairly quickly. Notice how she accepts a baby step at a time.
Tip: Get good at this before moving to the front “shoulder-over”.
Front Leg Yields Under Saddle
The video of Reign (below) shows the progression from learning his cues on the ground to yielding under saddle.
Once under saddle:
1. Keep his head straight, reins even. Press your outside heel into the spot right at or just forward of the girth to “push” him the direction you want him to go.
2. Unlike the rear disengage, try not to twist your body or bring his head around. That re-adjusts your fanny bones and gives him a cue to disengage his rear. (It also automatically brings the wrong leg into contact with his body, so take care to leave the inside leg OFF his body – open the door for him to move around.)
3. Sit back slightly – particularly if he has already mastered the “relax-back” position of a “whoa” seat cue. You want to put your weight slightly on his rear so that his front can spin easily with all of the weight on the rear. If his forward movement is also inhibited by the “whoa” position, so much the better.
4. Cluck or Click a little to get movement.
Tips:
1. If you are too occupied with getting movement to watch his feet, use your friend again to tell you if the feet are moving correctly. Ask for baby steps and then more and faster.
2. Because the rear disengage is easier for most horses, they want to resort to that maneuver any time they feel pressure on the side of their body. Be prepared for him to make this mistake.
3. If he moves his rear away instead of moving his front in the direction you want him to turn, set your horse up against the fence “haunches in”, so that his fanny is close to the fence on the off side. That will keep him from swinging his rear (into the fence) when you ask for the front-only movement.
Using the same “Pressure- Relax” method to keep him taking steps one after another: Ask. Stop pressure. Ask. Stop pressure. Ask. Stop pressure. As each step releasess pressure, he begins to take more steps to reach a pressure-free state. It seems somewhat counter-intuitive that ask-release-ask-release gets a horse to keep turning. But asking and asking and asking without any release will not motivate him to continue to spin.
As he takes more cross-over steps around the circle, you are starting to get the front spin. Getting a beautiful and fast spin is an art. These simple starting instructions may not get you to that point, but you will be well on your way. Practice makes perfect.
Changing Direction:
Teaching your horse to turn easily is not difficult if he understands your leg cue to move his front over.
Changing direction has three steps:
1. look in the direction you want to go (this causes your body to shift a tiny bit in your seat),
2. put your leg on his outside shoulder to encourage him to move away from your leg in that direction,
3. No turn? Use the inside rein to adjust his head the desired direction if he has not turned using the first two cues. (If you MUST use the reins every time, he needs more practice with his front disengages. The goal is to use your legs, not your reins.)
After practice, he will begin to change direction when you move your body ever-so-slightly to look in the direction you want to go, which brings your outside leg into very light contact with his barrel. (read: Anticipation.
Turning left or right while moving forward is the easiest of the maneuvers. If he has good ground training that teaches him to move away from the leg pressure, turning happens.
Beginning Shoulder Over Spiral
A fancy spin is fun and flashy, but rarely needed or used by the weekend rider. Most people are interested in moving the horse’s shoulder over to get more subtle direction changes using their leg. Now that the horse is educated to move away from your forward leg pressure, you can start spiraling out from the center of the round pen to the outer edge moving both forward and laterally simultaneously. (Don’t use rein cues for this spiralling exercise. His job is to understand your body and leg cues.)
Start in the middle of the round pen. Move off at a slow walk toward the rail. Look to where you want to end up and keep your eyes on it. Looking at your target adjusts your body ever-so-slightly in that direction. To spiral clockwise, press your left leg just in front of the girth and remove your right leg from his body. This might take strength for legs that are not used to pressing. You may feel like you are pushing the whole horse. He should begin to move both forward AND to the right (diagonally), easing his way to the rail. When you get there, he should be feeling the need to go to the right (continuing clockwise) when forward movement is no longer possible.
If, in the middle of the pen, he complies and moves off laterally as well as forward, lighten the pressure, and only re-apply it if he stops moving laterally. When you are at the rail and moving along it, remove the leg so he can travel forward along the fence in the usual manner. Make the circle and then return to the middle. Stop and rest.
Repeat this spiral many times, until he seems soft to the pressure and circles out easily. Then train his other side.
If you can’t get the spiral, go back to the turn on the haunches, but ask for just one step over. Get him used to not going in a 360 degree circle every time. He should stop turning when the heel is off his side
After he has done this in the round pen over and over, he will anticipate that when you leave the center of the ring, you will spiral out to the rail. He is not necessarily thinking about the leg so much as the pattern of the exercise, taking a very subtle cue to indicate your intended direction. Now it is time to go to a less-obvious fenced area: the arena.
Ride the rail in the arena a couple of times to loosen him up. Then go to the center of the arena and move him forward with your left leg on and right leg off. This should head him on a diagonal toward the right rail. Horses are generally practiced more going toward the rail than leaving it, so he will be less likely to make a mistake and try to go against your leg.
When he seems easy about moving toward the rail on both sides, start at the rail and move to the center. As you ride the long side, begin to pressure him (leg) toward the middle – away from the fence. He should drift easily inward. If he doesn’t drift, use the inside rein to quickly (but gently) “jerk” his head toward the middle of the arena. It is not a heavy-handed jerk, but it is a tiny bit startling. That should get his attention toward moving that direction. (Be sure your inside leg is off so that he can move easily.)
After some practice, he will begin to change direction when you move your body ever-so-slightly to look in the direction you want to go. (read: Anticipation)
Soon you should be able to drift toward the rail and back toward the middle and back again with ease.
Drifting is the first stage of moving directly sideways.
Move on to Sidepass
Horse training and equestrian activities in general can be dangerous. While we try to present relevant and valuable content, under no circumstances does horse-pros.com or its members or contributors take any responsibility for the well-being of any horse or person using a method outlined here.
We certainly don’t know everything. Please share your expertise and experiences. Comment on what is already written or Suggest a Category and Educate us about it. Grow Horse-Pros.com©